Speed Comes From Sequence, Not From Better Tools
Every experienced cabling tech has watched a junior installer waste an hour swapping patch cords, switching ports, and rebooting endpoints when the actual problem was a single conductor open at the punch-down. The tools available to find that fault were exactly the same. The difference was the sequence of tests run -- and the discipline to follow that sequence on every call instead of guessing.
This article describes the sequence we recommend for finding a copper cable fault fast. It assumes you have a basic wiremap tester with length-to-fault capability and a tone generator. With that toolkit and this method, you should be locating most faults in 3 to 5 minutes.
The 5-Step Fault-Finding Workflow
Step 1: Visual inspection (30 seconds)
Look at both ends of the cable before doing anything else. At the wall plate: is the jack loose, the cable pulled out of the back of the jack, the patch cord visibly damaged at the boot? At the patch panel: is the punch-down intact, are the conductor pairs still seated, is the cable sheath split where it enters the panel? In the ceiling at any accessible point: is the cable crushed by a tile, pinched by HVAC ducting, melted near a heat source, or chewed by rodents?
Visual inspection finds 20 to 30 percent of faults before you ever pick up a tester. It costs you 30 seconds and saves you 10 minutes.
Step 2: Wiremap test (60 seconds)
Connect your wiremap tester at one end and the remote unit at the other. Read the result. The wiremap tells you immediately what class of fault you have:
- Open on one or more conductors -- continuity is broken somewhere along the run
- Short between two conductors -- two wires are touching where they should not
- Miswire -- conductors connected to the wrong pins (T568A vs T568B confusion is common)
- Reversed pair -- the two conductors of a pair are swapped at one end
- Split pair -- conductors connected to correct pins but pairs not maintained physically (this requires a tester with crosstalk-based split-pair detection)
- All clear -- the wiremap is fine, the fault is performance-related (NEXT, return loss, length, EMI)
Step 3: Localize with length-to-fault (60 seconds)
If the wiremap shows an open or short, your tester's length-to-fault function tells you how far from your end the fault sits. A reading of 1 foot means the failure is at the connector you are plugged into. A reading of 87 feet on a 90-foot run means the failure is at the far-end connector. A reading of 42 feet on a 90-foot run means the failure is mid-span and you have a real fishing job ahead of you.
The two endpoints account for 70 to 80 percent of faults in our experience, so most of the time the length-to-fault reading will be very short or very near the full cable length, and you can move directly to re-terminating the indicated end.
Step 4: Tone and trace (90 seconds, only when needed)
If length-to-fault placed the fault mid-span, you need to physically locate that point in the cable run. Connect a tone generator to the cable at the patched-out end and use the inductive probe to trace the cable through the ceiling, walls, or cable tray. When the tone goes silent or changes character at a specific point, you have located the fault zone.
For a fault on a single conductor that still has continuity through the other conductors, place the tone on the faulted conductor specifically. The probe will follow tone all the way to the failure and lose it there.
Step 5: Confirm and fix (60 seconds + repair time)
Once you have located the failure, the repair itself is usually fast: re-terminate the connector, replace the section of damaged cable, or pull a new run if the existing run is unrepairable. After the repair, run the wiremap test again to confirm pass. Document the fault, the location, and the fix in your service notes -- this becomes future diagnostic context for the same site.
Fault Type Reference: What the Wiremap Is Telling You
Every wiremap result narrows down the failure mode and the most likely cause. Use this table as a quick reference in the field.
| Wiremap Result | Likely Cause | Where to Look First | Avg Time to Fix |
|---|---|---|---|
| Open on 1-2 pins | Bad termination at one end | Connector showing the open | 3-5 min |
| Open on 4+ pins | Cable cut, severe crush, or rip-out | Mid-span cable damage | 15-60 min |
| Short between 2 pins | Connector damaged, conductor pinch | Re-terminate suspect end | 5 min |
| Reversed pair | Termination error | Re-pin connector to T568A or B | 5 min |
| Crossed pair | T568A on one end, T568B on the other | Re-terminate one end to match | 5 min |
| Split pair | Conductors put on correct pins but wrong pair | Re-terminate following pair colors | 5-10 min |
| Wiremap pass, link fails | Performance issue (NEXT, length, noise) | Run qualification test | 15-45 min |
Common Mistakes That Slow You Down
Skipping visual inspection
Plugging in a tester before looking at the cable means you may spend 5 minutes diagnosing a fault that a 30-second look would have shown you immediately. Look first.
Testing with the patch cords still in place
If the wiremap fails, isolate the variables: test the permanent link with known-good test patch cords, not the customer's patch cords. A bad customer patch cord at the desk masquerades as a bad permanent link constantly.
Trusting length-to-fault on uncalibrated NVP
Length-to-fault accuracy depends entirely on the nominal velocity of propagation value programmed into your tester. If you set NVP for Cat5e and the cable is actually Cat6, your fault distance will be off by 5 to 10 percent. Calibrate against a known-length cable of the same type when accuracy matters.
Ignoring the patch panel
Patch panels concentrate cable stress and termination errors. A high percentage of faults at the panel end are punch-down problems: a conductor that is not fully seated, a pair that has been disturbed by adjacent work, or a panel jack with bent contacts. Always inspect the panel termination, not just the wall jack.
Replacing the cable before localizing the fault
If you pull a new run before you have isolated whether the fault is at a connector or in the cable itself, you may be doing 45 minutes of pulling new cable to fix what was a 5-minute re-termination. Localize first.
The Toolkit That Supports This Workflow
You can run this workflow with a basic toolkit. The minimum useful set:
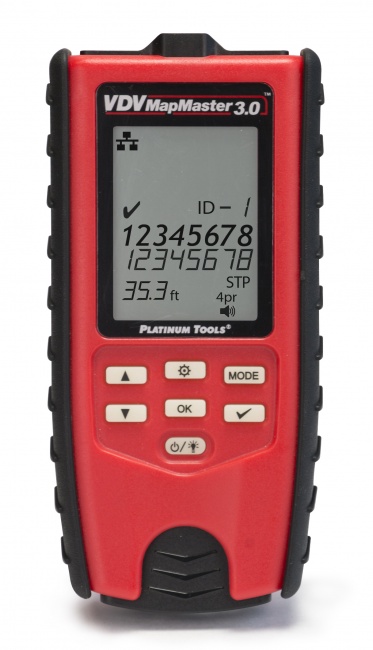
Wiremap tester with length-to-fault
The single most important tool. The VDV MapMaster 3.0 covers steps 2 and 3 in one device: wiremap, length, distance-to-fault, split pair detection, and cable ID for finding the right cable in a bundle.
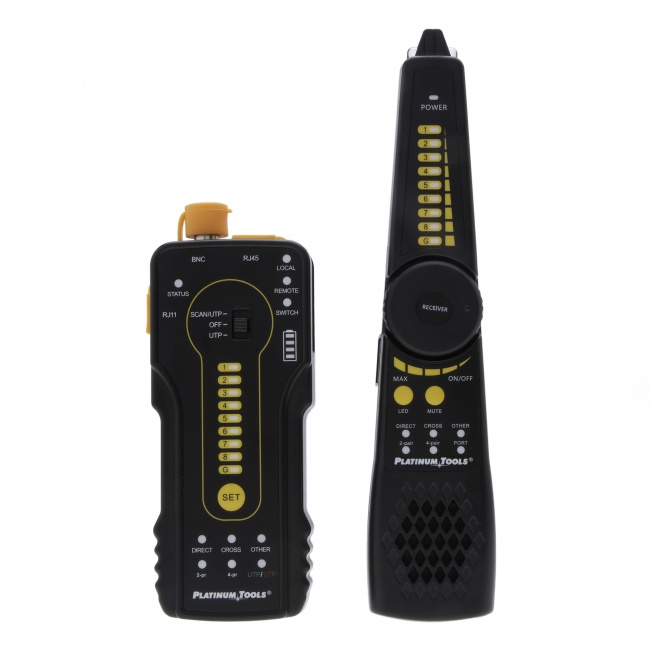
Tone generator and probe
A digital tone and probe set physically locates cable runs and isolates faults to a specific point along the run. Essential for step 4 when the fault is not at the endpoints.
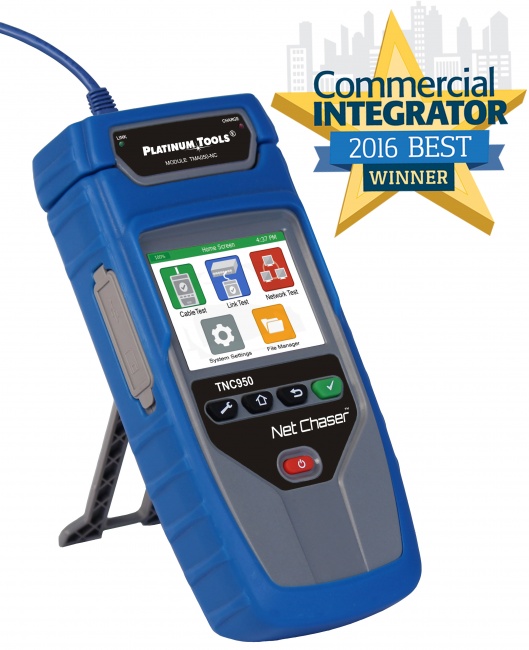
Network qualification tester
For wiremap-passes-but-link-fails situations, a qualification tester like the Net Chaser validates whether the cable can support the required network speed. This catches performance issues that a wiremap tester cannot see.
Realistic Time Budget by Fault Type
Some faults take longer than 5 minutes no matter how good your method is. The workflow above gets you to the fault diagnosis quickly; the repair itself depends on the fault type. Plan accordingly.
- Bad termination -- 5 to 10 minutes including re-test
- Patch cord failure -- under 2 minutes (swap and retest)
- Mid-span damage in accessible run -- 30 to 60 minutes (locate, splice or pull new section)
- Mid-span damage in inaccessible run -- 1 to 3 hours (pull a new run)
- Performance failure (NEXT, return loss) -- 15 to 45 minutes (re-terminate both ends, retest, possibly recategorize the cable)
- Multiple drops failing simultaneously -- different problem class entirely; check switch port assignments, panel grounding, EMI sources
For deeper background on what specific tester results mean, see our guides on cable tester vs certifier and how to read certification reports.
Frequently Asked Questions
What is the fastest way to find a cable fault?
The fastest workflow is visual inspection, then wiremap, then length-to-fault, then tone-and-trace if needed. With practice the entire sequence takes 3 to 5 minutes and isolates most faults to within a meter of the actual failure.
Do I need a TDR to find a cable fault?
Not always. If the failure is at one of the connectors, a wiremap test alone tells you which end has the problem. A TDR or length-to-fault function is needed when the failure is somewhere along the cable run between the connectors. Most modern qualification testers include length-to-fault, so a separate TDR is rarely needed for low-voltage twisted pair work. See our guide on TDR cable testing for more.
How accurate is length-to-fault measurement?
Typically accurate to within 1 to 3 feet on copper twisted pair, depending on the cable's nominal velocity of propagation (NVP) and how accurately you calibrate the tester to that NVP. Calibrate against a known-length cable of the same type for best accuracy.
What is the most common cable fault?
Bad terminations -- usually at the connector or punch-down block -- account for the majority of cable faults in service. The endpoints are where physical stress, installer technique, and repeated insertions converge.
Build the Toolkit That Speeds Up Every Call
Wiremap testers, tone-and-trace sets, and qualification tools that turn 2-hour fault calls into 5-minute fixes.