What "Acceptance Test" Actually Means
Acceptance testing is the formal handoff process where the customer (or their representative) verifies that the cabling system meets the agreed contract specifications. It is documented, repeatable, and produces a deliverable test report that the customer files for the life of the building.
It is not the same as the contractor's internal QA testing. Internal QA happens during installation — the tech tests each run as it is finished, fixes anything wrong, and signs off so the next trade can move in. Acceptance testing happens at the end, with all links live, with the customer or general contractor in the loop, and produces a final report that is part of the project closeout package.
Step 1: Read the Contract Before You Mobilize
Every dollar wasted on the wrong test scope comes from skipping this step. Before you load the truck, confirm:
Test category
Cat5e, Cat6, Cat6A — what does the spec require? Test against the spec, not against the cable category installed. A Cat6A cable tested to Cat6 standards passes the wrong test.
Test topology
Permanent link or channel? See channel vs permanent link for the distinction. New-construction acceptance is almost always permanent link.
Test standard
TIA-568.2-D, ISO/IEC 11801, customer-specific spec? Most US commercial work uses TIA. Some healthcare and government specs reference ISO. Pick the wrong one and the report is rejected.
Sample size
100% (default) or a negotiated sample? Get this in writing. Verbal agreements about reduced testing scope evaporate when there is a payment dispute.
Deliverable format
PDF report? CSV export? Native certifier file (.flw, .lwm)? Some customers want all three. Confirm with the GC or owner's representative before testing starts.
Manufacturer warranty registration
If the contract requires registering for a 25-year manufacturer warranty (Belden, Panduit, Leviton, Commscope, etc.), the manufacturer dictates the test parameters and report format. Always more rigorous than the TIA minimum.
Step 2: Pre-Test Checks Before the Customer Walks In
The day before acceptance, run through these checks:
Certifier health check
Run the certifier's self-test or daily reference calibration. Inspect permanent link adapters for visible damage to the contact pins or insulation. Replace adapters that show wear. Check certifier firmware against the manufacturer's current release.
Battery and storage
Charge all batteries the night before. Clear old test results from the certifier (back them up first) so you have storage space for the day's work.
Test plan and labeling
Confirm the link labeling scheme matches what is on the patch panels and the as-built drawings. Inconsistent labeling is the #1 cause of acceptance test rework — the customer cannot match a test result to a port if the label on the report does not match the label on the panel.
Sample test on a known-good link
Pick three links you have already tested internally. Run permanent link tests. Compare results to the prior tests. If results match, the certifier is healthy. If they drift, recalibrate before doing customer-facing work.
Backup certifier
For large jobs, bring a second certifier. Equipment failure during acceptance is not an excuse the customer accepts.
Step 3: The Test Plan
Sequence
Test in patch panel order, room by room, floor by floor. The customer can follow along on the as-built drawings and confirm each link is being tested in the expected location.
Per-link procedure
- Visually verify the link label matches the patch panel label.
- Connect main certifier to patch panel port. Connect remote to wall outlet.
- Run autotest. Wait for result.
- If PASS: save with the standard label format (e.g., "B1-IDF1-PP1-J17"). Move to next.
- If FAIL: do not panic. Save the failure with a "-F1" suffix. Note the failed parameter. Move to next link, queue this one for remediation.
Pace
Plan 80-150 links per tech per 8-hour day for full certification, including breaks and contingency. A 200-drop floor is a 2-day testing effort with one tech, or 1 day with two.
Live customer presence
Some customers want to watch every test. Others trust the deliverable. If they want to watch, set expectations: it is repetitive, the certifier shows pass/fail in 10 seconds, and the day is mostly walking between drops. They will leave after the first hour.
Step 4: When a Cable Fails
Failures during acceptance testing are not catastrophic. They are normal. The professional response is to document, diagnose, remediate, re-test.
Document
Save the failure with the standard label format and a "-F1" suffix indicating first-attempt failure. Note the failed parameter (NEXT, return loss, length, etc.) in the test result file.
Diagnose
Review the failure result. NEXT failures usually mean termination quality. Length failures mean the cable is over 90 m. Insertion loss failures could be length, damage, or wrong cable type. Return loss failures indicate impedance mismatches at connection points. See crosstalk troubleshooting for parameter-specific guidance.
Remediate
The most common fix is re-termination at one or both ends with minimal untwist. For length failures, the cable run usually needs to be re-pulled (rare in modern installations because length is checked during installation). For damage, splice or replace the affected segment.
Re-test
Run the same test again. Save with a "-F2" suffix if it fails again, or save as the official PASS result if it passes. Some certifiers automatically overwrite — set yours to keep history.
Failure rate expectations
A well-run installation should have a first-pass failure rate under 2%. Higher rates suggest systematic issues — a single tech with poor termination technique, a bad batch of jacks, or a cable spool that is out of spec. Investigate root cause if you see clusters of failures.
Tools You Need on the Truck
Full Certifier
Fluke DSX-5000/8000, Softing WireXpert 4500/500, or VIAVI CertiFiber. Required for TIA/ISO certification. $8,000-$15,000 to own; rentals available for short engagements.
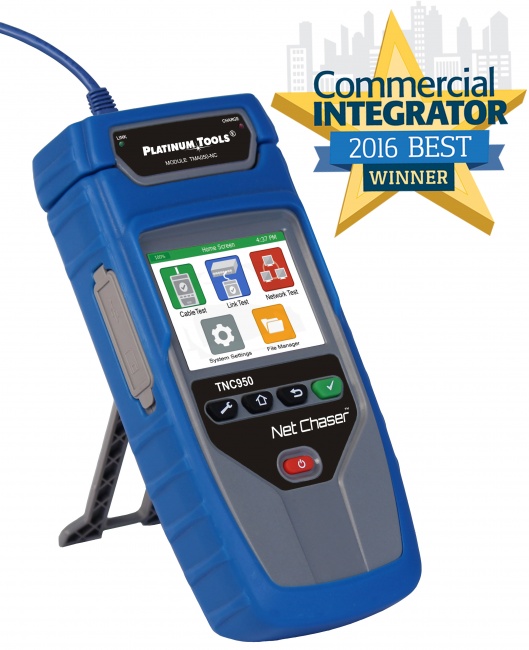
Backup Qualifier
Net Chaser for triage if the main certifier goes down. Also useful for in-process verification before formal acceptance testing begins.
Toner-Probe
Digital Tone & Probe for identifying which port is which when patch panel labeling is unreliable.
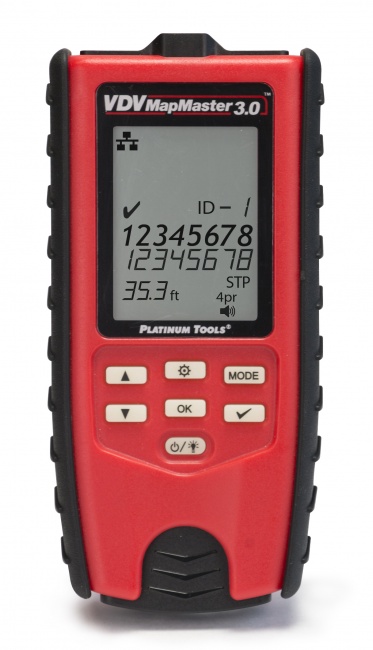
Wiremap Tester
VDV MapMaster 3.0 or LanSeeker for quick re-verification after re-termination, before re-running the full certification test.
Acceptance Test Day Checklist
| Stage | Item | Owner |
|---|---|---|
| Pre-test (day before) | Certifier self-test, batteries charged, results cleared | Lead tech |
| Pre-test | Adapter inspection, replace worn permanent link adapters | Lead tech |
| Pre-test | Confirm test scope, topology, standard with PM/customer | PM |
| Pre-test | Confirm labeling scheme matches as-built drawings | Lead tech |
| Test day | Calibration check on 3 known-good links | Lead tech |
| Test day | Test in patch panel order, save with consistent labels | Tech(s) |
| Test day | Document all failures, queue for remediation | Tech(s) |
| Remediation | Re-terminate, re-test, save PASS over FAIL with history | Tech(s) |
| Handoff | Generate PDF report, deliver native files, register warranty | PM + Lead tech |
| Handoff | Customer signature on acceptance letter | PM |
Step 5: Handoff and Sign-Off
Generate the deliverable report
Export the certifier results to PDF and native format. Most projects also want a CSV summary. Group results by floor, IDF, and patch panel for easy review. See how to document cable test results for the report format.
Manufacturer warranty registration
Submit results to the cable manufacturer (Belden, Panduit, Leviton, Commscope, etc.) per their warranty registration process. Most accept upload through a portal; some require email submission. The certificate is part of the project closeout package.
Customer sign-off
Walk the customer through the report. Show 100% pass on every link. Hand over the closeout binder with: as-built drawings, test report PDF, test result native files, manufacturer warranty certificate, list of patch cord categories and lengths. Get a signature on an acceptance letter.
Close out the certifier
Back up all test results to your archive. Keep them for the life of the project warranty (typically 25 years). Customers do come back asking for the original test data when they investigate a future fault.
Frequently Asked Questions
What is a cable acceptance test?
The formal process by which a customer accepts a completed cabling installation as meeting contract specifications. Typically requires testing 100% of installed runs and delivering a documented test report.
Do all jobs require certification or just a wiremap test?
Read the contract. Wiremap-only is common in residential. Qualification testing is common in office buildouts. Full TIA/ISO certification is required for healthcare, education, government, financial services, and any project with manufacturer warranty registration.
How much testing time should I budget for an acceptance test?
Full certification: 80-150 links per tech per 8-hour day. Qualification: 200-300 links per day. Wiremap: 400+ per day. Add 20% contingency for failures. A 500-drop building is 4-7 days of certification including re-tests and handoff.
What happens when a cable fails the acceptance test?
Document the failure, diagnose the cause (typically termination), remediate (usually re-terminate), and re-test. Retain the failure for traceability but deliver only the final PASS results to the customer.
Can I sample-test instead of testing every cable?
Sampling is a contract negotiation, not a default. The TIA standard expects 100% testing. Get sampling approval in writing up front; for warranty registration, manufacturers require 100%. Do not assume sampling is allowed.
Equip Your Team for Acceptance Testing
From qualifiers to full certifiers — the right tool for every contract scope.